How to Migrate Exchange Mailbox to Office 365 – Hybrid Migration
The demand for cloud services has immensely increased within the last few years. The acceptance of cloud is rather very high in the business world as every IT company consists of the 80% of cloud supporters. Where the Exchange on-premise system tends to be complex with so many moving parts and needs specific expertise to run or operate. Also, the Exchange Server and the hardware in which it runs (like a disk, server, RAID, power, backups, heating, cooling) costs very high. The pricing of the Exchange licensing, security (SSL certificates), maintaining and updating is higher than Office 365. As the Exchange Online is predictable and flexible that lets users to buy as many licenses as they want either scale up or scale down. Due to all these eminent qualities of O365, Exchange users are inclining towards it and searching the solution for how to migrate Exchange mailbox to Office 365. In this write up, we are going to discuss some easy and cost-efficient techniques to execute such migration quickly and seamlessly. So, let us begin now.

Transfer Exchange 2010, 2013, 2016 to Office 365: Hybrid Migration
Using Exchange-based hybrid deployment, users can either migrate on-premises mailbox to Office 365 or move Office 365 mailboxes to Exchange. While migrating the mailboxes from Exchange on-premise to Exchange Online, one needs to use migration batches to execute the remote mailbox move request. This technique lets users move the existing mailboxes instead of generating the new user mailboxes and import the user info.
Benefits of Hybrid Exchange to Office 365 Migration
Before You Begin the Exchange 2016, 2013, 2010 Migration to Exchange Online
Steps to Execute Hybrid Exchange Mailbox to Office 365 Migration
Step 1: Create Migration Endpoint
Before executing the off-boarding and on-boarding remote mailboxes migration in the Exchange hybrid deployment, it is recommended to create Exchange remote migration endpoints. The connection settings of On-premise Exchange consists in the migration endpoint, which runs MRS proxy that is essential for remote migration.
Step 2: Turn on MRSProxy Service
The MRS Proxy Service needs to be enabled now on the On-Premise Exchange Client Access Servers. Below are the guidelines for same:
Step 3: Using EAC to Migrate On-Premise to Exchange Online (Office 365)
One can utilize the remote move migration on Office 365 menu in EAC on the Exchange Server to move the existing user mailboxes to Exchange Online. Follow below-mentioned steps to move mailbox from Exchange to Office 365:
Step 4: Eliminate Completed Migration Batches
Once the Exchange 2010, 2013, 2016 mailbox to Office 365 hybrid migration procedure gets finished, the next thing is batch removal. As it reduces the chances of errors in multiple conditions where the same users are moved again. Below are the steps for same:
Step 5: Re-enable Offline Access for OWA
The offline accessing in OWA (Outlook Web App) allows the users to access the mailboxes even if they are not connected to the network. In case, if the users need to move on premise to Exchange Online then, they need to reset offline access setting in the browser for using OWA offline.
After executing all above steps sequentially and carefully, all your Exchange mailbox will be migrated to Exchange Online successfully.
Limitations Of Hybrid Migration
Effortlessly Migrate Exchange 2013, 2016 to Office 365 Step by Step
In order to get rid of the limitations of the manual solution, one can go for a trusted third-party application. SysTools Exchange to Office 365 Migration tool is one such reliable solution to move mailboxes from offline as well as Live Exchange Server to Exchange Online account. With the help of this utility, one can export all the mailbox items such as emails, contacts, calendars, tasks, notes etc. The software is completely secure to run assures complete mailbox migration even without resulting any kind of data loss.
Advanced Features of Exchange to Office 365 Migration Tool
No Data Loss During Migration – This software is advanced enough and developed using advance algorithms which helps it exporting 100% data into Office 365 account. Users who are looking for an automated software to migrate emails, calendar and contacts from their mailboxes without any data loss, they must give this tool a try.
Concurrent Migration – As there are various tools available in the market to perform migration, but many software does not provide the option of batch migration. So, to make you task simple and efficient, this software allows users to transfer 200 mailboxes in one go. For this, the users just have to enable the option under Settings Window and require a machine with high configuration.
Transfer Large Sized Mailboxes as Well – Many users face issues while they migrate large sized Exchange mailboxes. This tool to migrate Exchange mailbox to Office 365 makes sure that all the mailboxes whether small or large are exported without any loss of data.
Steps to Migrate Exchange 2013, 2016 Mailboxes to Office 365
Step 1: Run the tool and Select Source & Destination Platform as Exchange and Office 365.
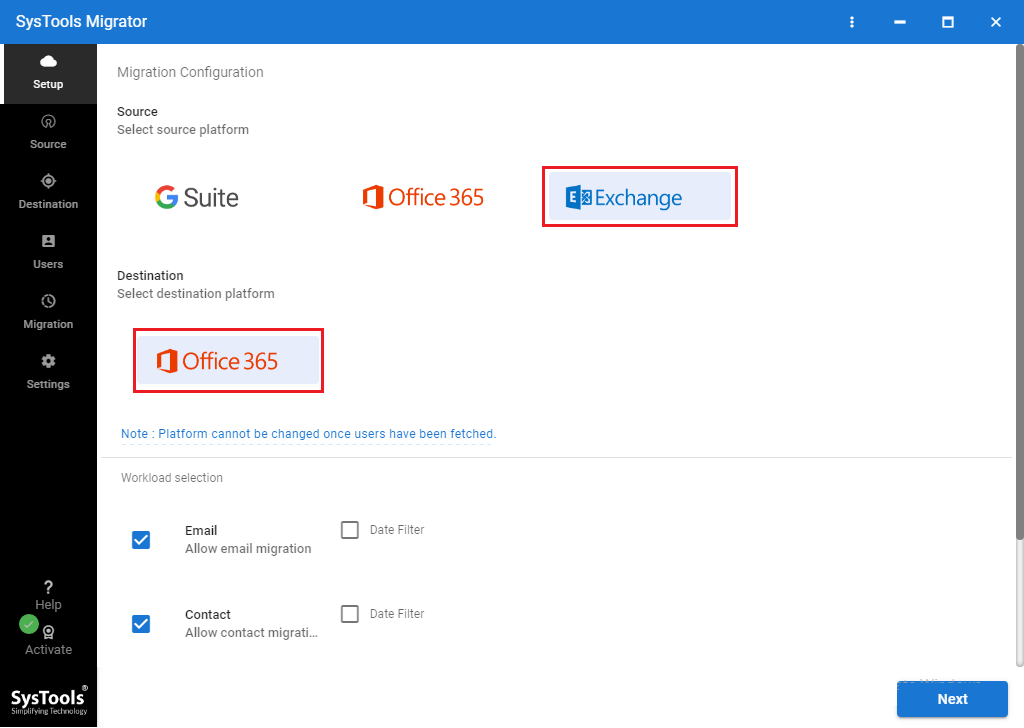
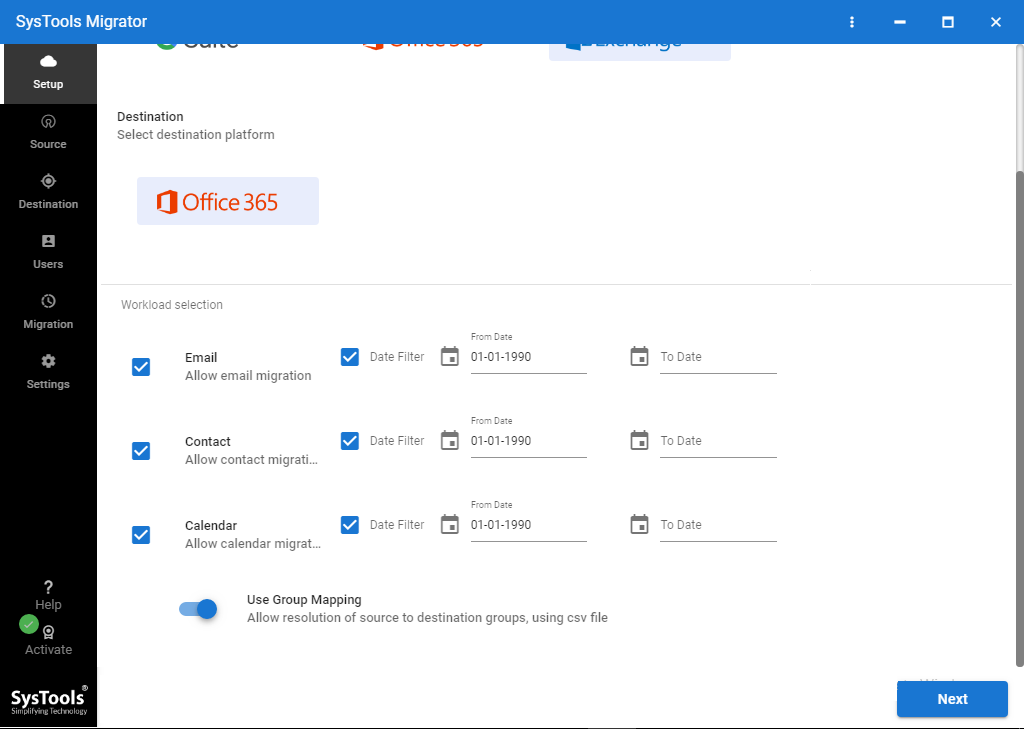
Step 2: Under Workload Selection, select required Categories and use Date-Range filter if needed.
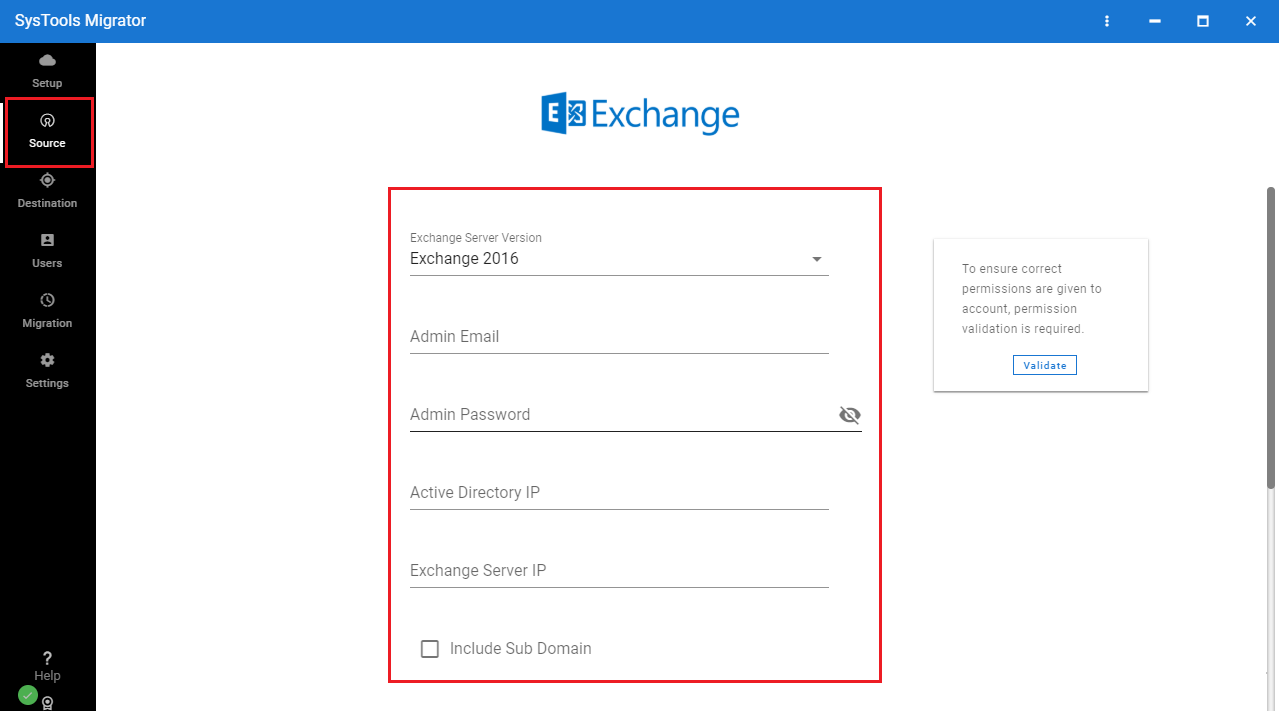
Step 3: Enter Exchange Server IP and Admin Credentials and Validate them to proceed further.
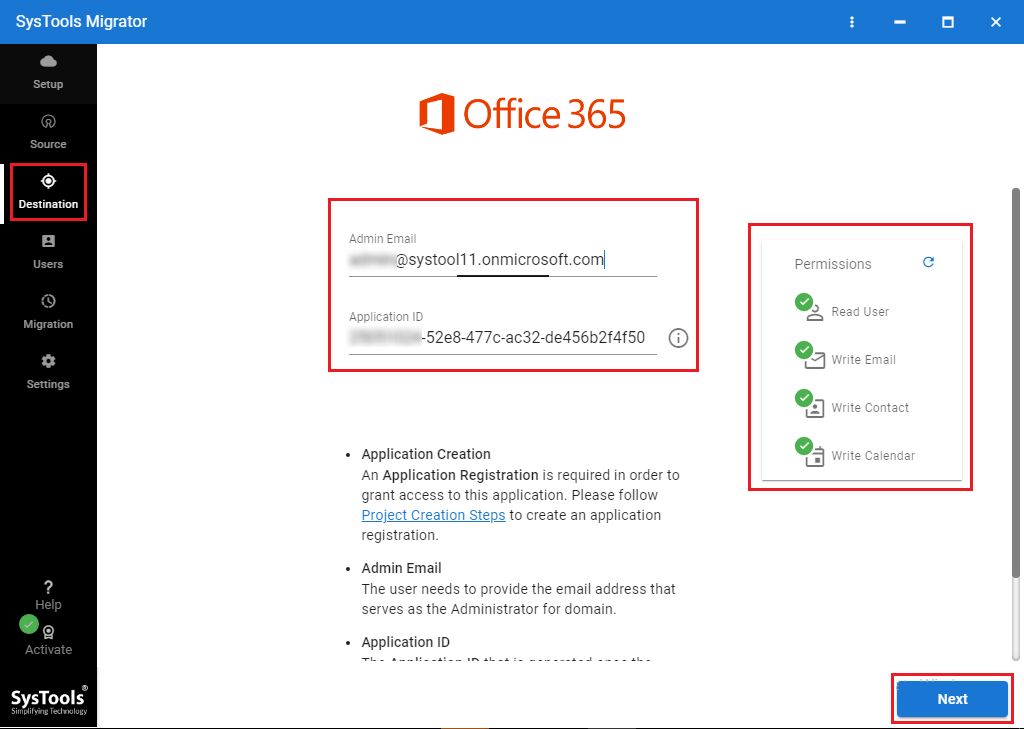
Step 4: Provide Office 365 Admin ID and Application ID and Validate them.
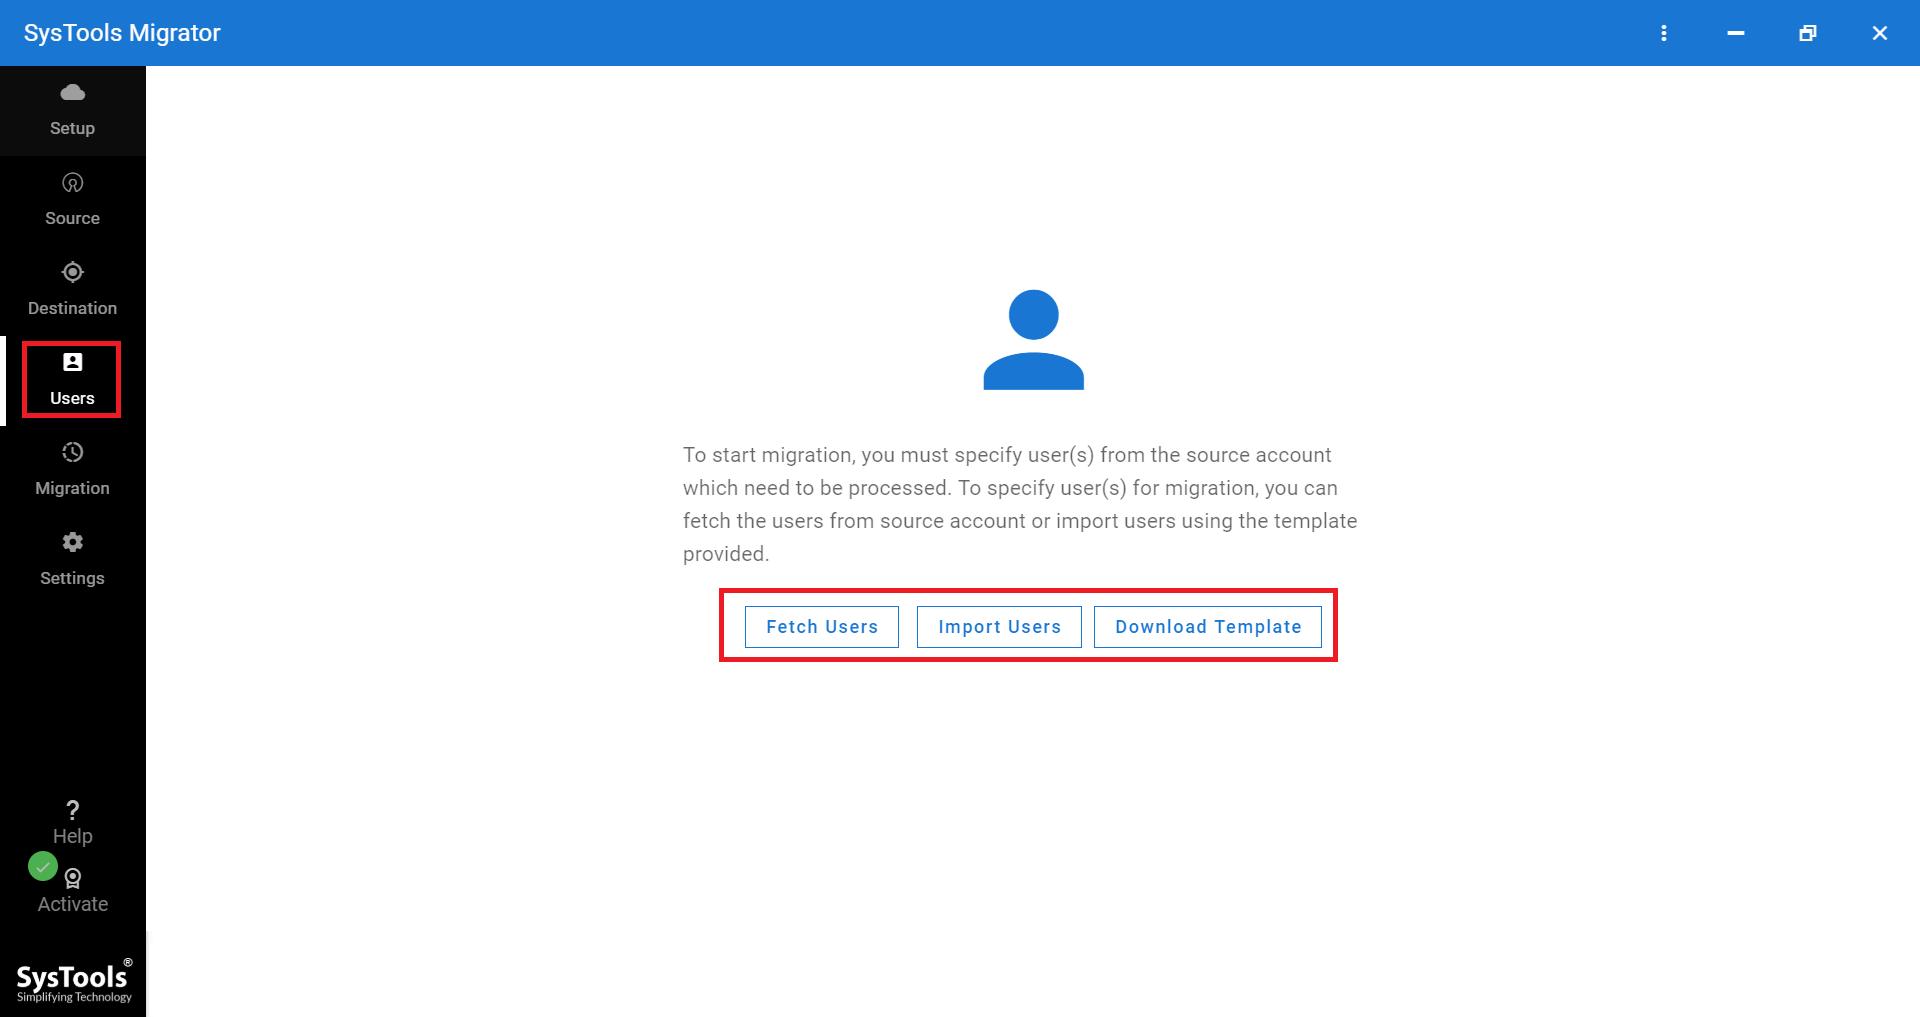
Step 5: Fetch or Import users and map source and destination mailboxes.
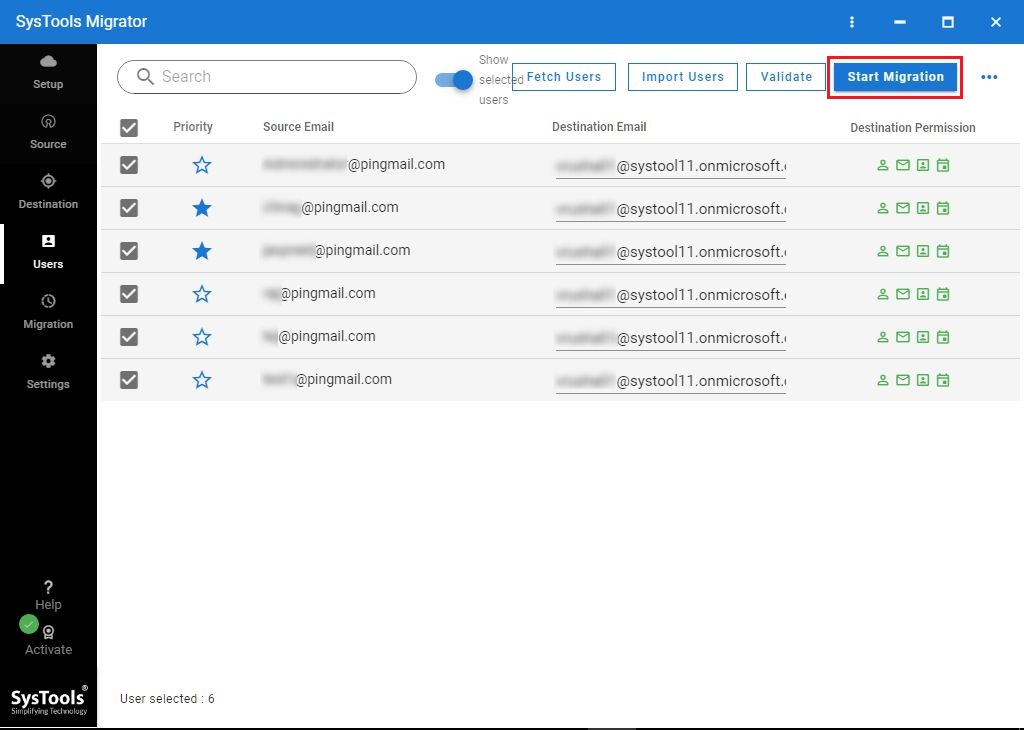
Step 6: Click on Start Migration button.
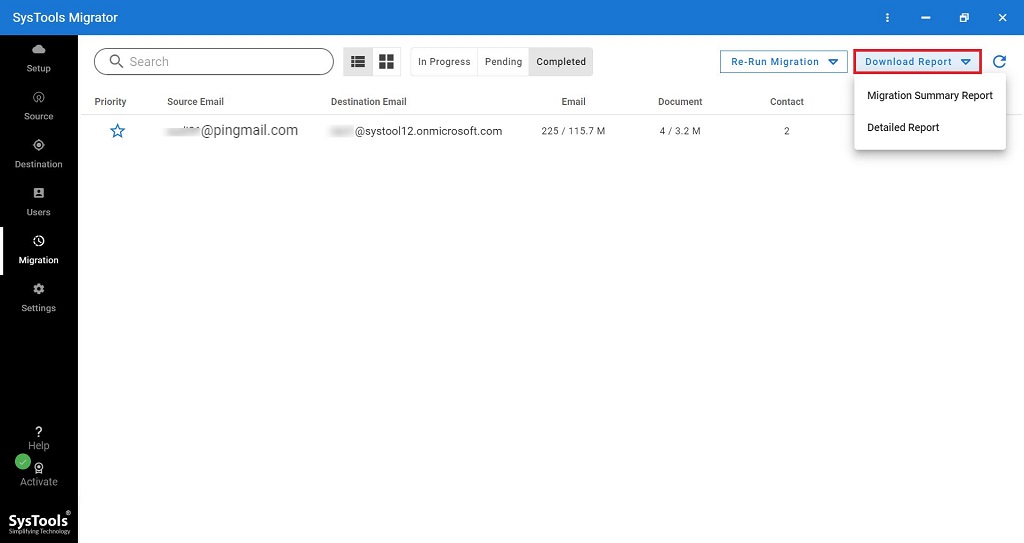
Step 7: You will get both Summary Report and Detailed Report after completion of migration.
Concluding Lines
Considering the common user query i.e., how to migrate Exchange mailbox to Office 365 in a step by step process using Hybrid migration, we have come up with this article. Here, we have disclosed one manual solution for the same. However, if users find the manual technique lengthy or complex then, an alternate solution is also recommended here. Now, one can opt any technique according to the current necessities and preferences.